
Dyeing workspace preparation and cleanup begin before the first jar is opened. Choose a dedicated work area, protect the surfaces, keep clean supplies separate from dye and rinse water, and decide how you will finish the job. A repeatable setup makes it easier to handle materials carefully and keeps the next project from inheriting this project’s spills.
This guide covers small textile-dyeing projects with known materials, including tie-dye, ice dyeing and botanical dye baths. It is a planning and housekeeping guide, not a universal chemical-spill procedure. Read the label and safety data sheet for each product. Unknown materials, substantial spills, strong fumes, reactions or symptoms require a different response: stop work, keep others away and seek appropriate assistance.
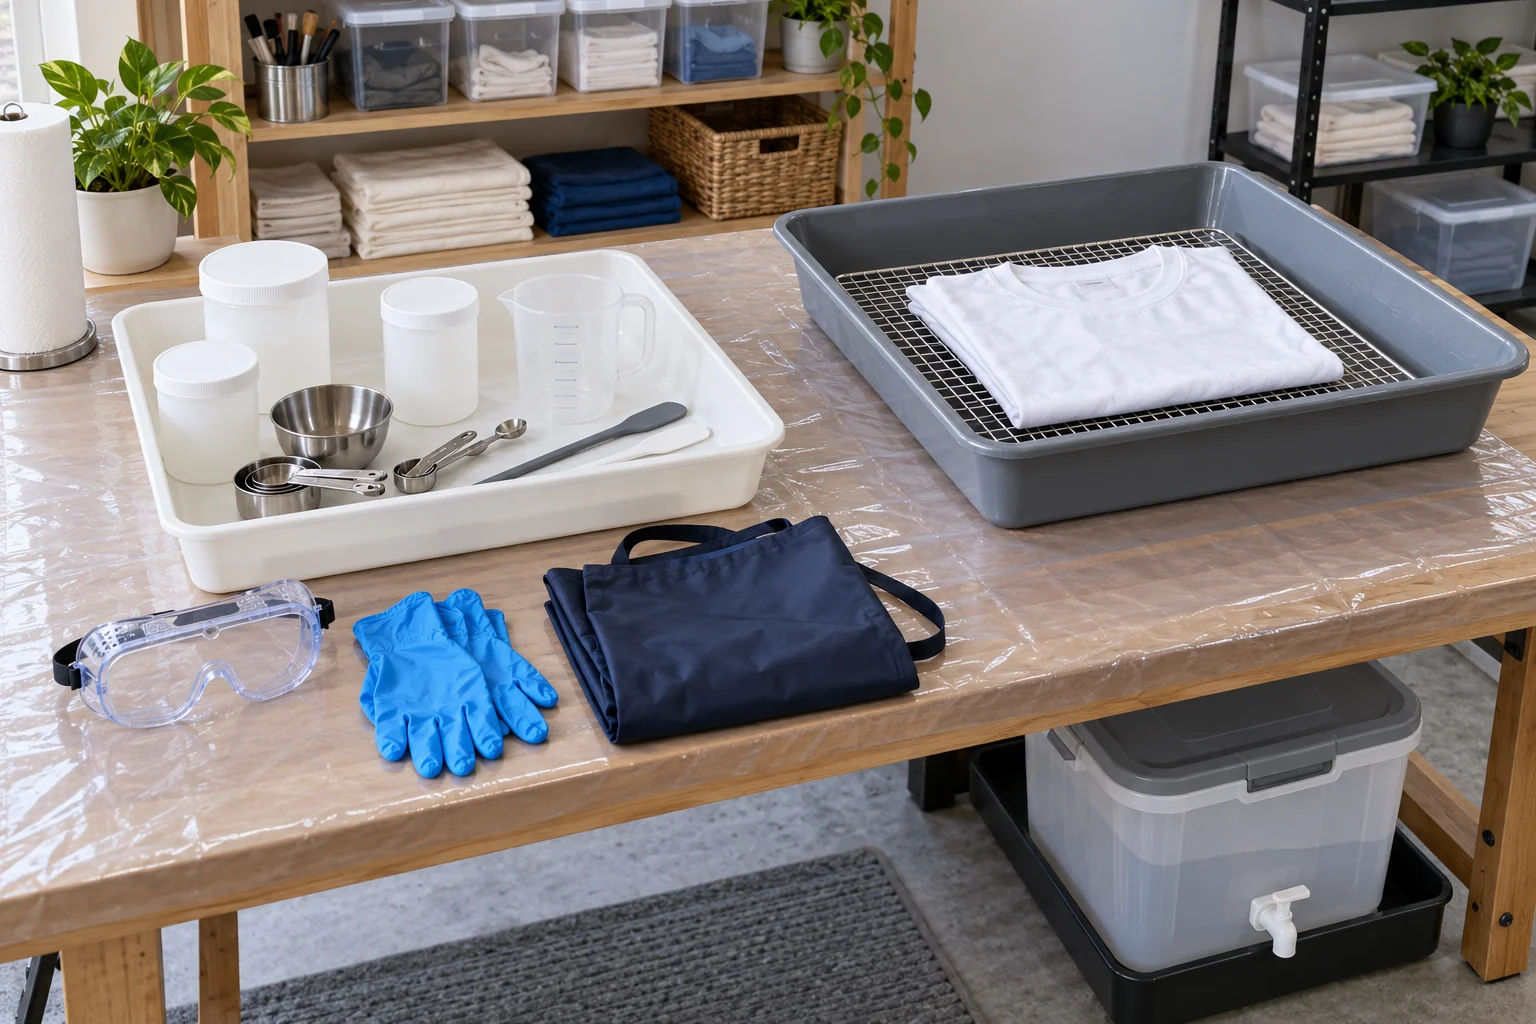
Before opening a dye container
Write down the project, fabric and dye method. A cotton tie-dye shirt, an indigo vat and a heated botanical bath have different work sequences. Identify the measuring, application, curing, rinsing and drying steps, then assign somewhere for each to happen. Include cleanup time in the project rather than leaving it as an unplanned final task.
Read the product’s handling, storage and cleanup information. Keep the instructions available without needing to touch a phone with contaminated gloves. If you need an SDS or a specification that is not listed, ask The Dye Store before beginning. Do not assume that a document for a similarly named dye describes your exact product.
Make a short supply list and check what a kit actually includes. Count your trays, dedicated utensils, cloths, suitable containers and protective equipment. Lay out a dry cotton shirt blank before mixing a fiber-reactive project so you are not searching through cupboards with wet hands. If a material or step is unclear, resolve it while everything is still closed.
Arrange clean, mixing and wet-work areas
A useful layout has three practical areas. The clean area holds instructions, unused fabric and unopened supplies. The mixing area contains the scale, dedicated scoops and a rimmed tray. The wet-work area holds the dyeing container or application rack and a catch tray. These areas can occupy one bench; the point is to make their boundaries obvious.
Place frequently used items where you can reach them without leaning across an open container. Leave a clear route for carrying wet textiles. Keep a stable spot for a container before you lift it, and avoid placing heavy liquid containers on a shelf that requires reaching above your shoulders. A practice run with empty containers can reveal a cramped arrangement before it becomes messy.
Keep food, beverages and food-preparation equipment out of the workspace. Set aside tools for dyeing rather than borrowing kitchen measuring spoons and returning them afterward. The CPSC Art and Craft Safety Guide discusses studio hygiene and separation from eating activities. Children and pets should not be able to enter the active work area or access stored materials.
Protect surfaces and choose your equipment
Choose stable, cleanable work surfaces compatible with the materials you will use. Protect a vulnerable bench with a suitable smooth covering and secure it so a sleeve or container cannot easily drag it sideways. Use a rimmed tray around mixing and application work. A tray helps define the work area; it is not a substitute for a stable container or an adequate spill plan.
Check nearby floors, chair seats, drawer handles and the route to your rinse area. Rugs, unfinished wood, grout and absorbent furnishings can be harder to clean than a smooth work surface. Keep clean towels outside the splash area and reserve a clearly identified set of cloths for dyeing cleanup. Test a proposed cleaner on an inconspicuous part of a surface before attempting cosmetic stain removal.
Select disposable nitrile gloves, chemical splash goggles and an apron for dyeing according to the actual materials and task. Gloves have chemical-compatibility limits, and an apron does not replace eye or hand protection. A heavier glove is not automatically suitable for every substance. Compare product details and manufacturer guidance; do not infer a protective rating from a product name.
Plan ventilation without directing a fan across loose powder. Where respiratory protection is specified, select the appropriate equipment and use it as instructed. A face covering is not a substitute for dust control or a guarantee of protection against vapors. Our PPE guide for dyeing explains the different roles of these protections.
Handle dye powders without spreading dust
For dyeing workspace preparation and cleanup, the measuring area deserves particular attention. Open only the container you need, work inside the tray and close it when the measurement is complete. Use deliberate movements close to the work surface. Avoid shaking powder from a height, tapping a scoop aggressively or opening multiple colors just to decide which one to use.
Follow the dye’s mixing instructions rather than assuming every powder should be treated identically. Keep scoops assigned to their material or clean them appropriately between materials. Return a lid to its matching container, and check that its outer surface is clean before moving it into storage. Never put spilled or mixed material back into the original jar.
Do not blow powder away, dry-brush it across the table or use compressed air. Do not use a household vacuum as an improvised chemical-spill tool. For a small known residue, use the cleanup method permitted by the label and SDS; damp wiping can help collect compatible water-based dye residues without redistributing them. A large, unknown or incompatible powder spill is outside this guide’s routine cleanup scope.
Keep the work area controlled while dyeing
Keep lids, caps and closures close to their matching containers. Arrange bottles so they can stand upright when you pause. For tie-dye, a raised rack and catch tray can help separate the garment from runoff; for ice dyeing, plan enough catch capacity for the melting ice as well as the liquid already present. Inspect the setup periodically instead of leaving an uncertain container unattended.
Move between tasks deliberately. Remove contaminated gloves before touching a phone, door handle or clean fabric, and replace them as appropriate before returning to work. Keep your written process notes in the clean area. If you need another supply, pause and tidy the immediate work surface before reaching into storage.
For heated dye baths, include a stable heat-safe work area and a place for the vessel to cool. Allow hot equipment and liquid to become safe to handle before moving or cleaning them. Do not make a crowded bench even smaller by stacking unrelated supplies around a hot container.
Respond to small spills
First stop the activity and identify what spilled. Check whether the material is a known small amount that you can manage with its stated cleanup instructions. Do not touch an unknown mixture to investigate it. If there is a reaction, concerning dust cloud, strong fume, significant spread or exposure, keep others away and obtain appropriate help rather than improvising.
- Protect the area. Stop foot traffic through the spill and keep children and pets away.
- Check the instructions. Confirm the cleanup method, compatible absorbent or cleaning material, required protection and disposal route.
- Control a small known liquid spill. If permitted by those instructions, use suitable absorbent material and work inward so the liquid is not spread over a larger area.
- Collect residue. Put used cleanup materials into the appropriate identified container. Keep incompatible wastes separate.
- Inspect the surroundings. Check the tray edge, underside of bottles, floor and nearby handles before reopening the area.
Dharma Trading’s general dye and chemical safety guidance recommends damp wiping for stray dye residue and prompt attention to liquid spills. Apply that advice only where it suits your material and its instructions. This is not a direction to add water to an unknown chemical or to wash a spill into a drain.
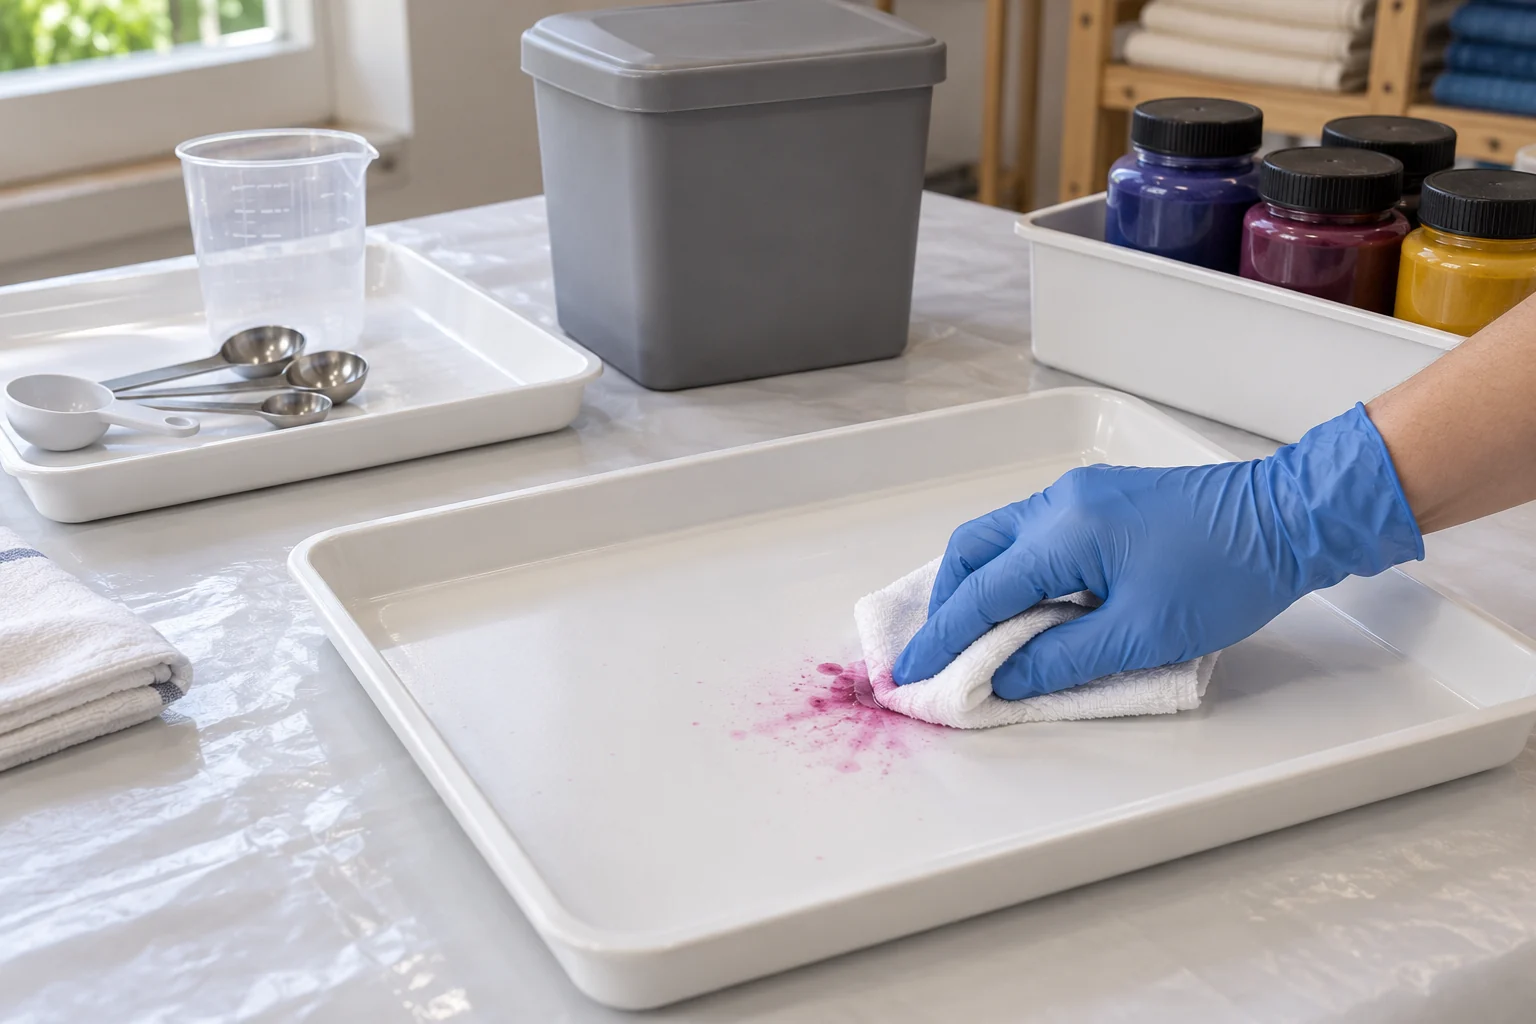
Clean the workspace in order
Start by closing and checking all stock containers. Set them in their storage tray away from the cleanup activity. Identify leftover solutions separately so they cannot be mistaken for fresh stock. Do not combine the contents of several containers merely to make the bench look tidy.
Next handle the tools according to the material’s directions. Keep the first collected residues and any cleaning liquid in the appropriate waste stream. Wash compatible reusable equipment as directed, then inspect scoops, threads, bottle caps, rack joints and container corners. Set cleaned tools in a separate drying area rather than back into the dirty tray.
Clean the work surface from the less contaminated area toward the active mixing and wet-work areas. Use fresh sections of a cloth so residue is collected instead of smeared repeatedly. Inspect beneath trays and containers, not just the visible space between them. Clean the floor after the bench so an earlier floor cleanup is not undone by drips from above.
Finally inspect your protective equipment and follow its care or disposal instructions. Remove contaminated equipment carefully, wash your hands and check the clean-touch points used during the session. Keep dedicated cleanup cloths separate from household laundry until you have followed the material-specific handling guidance. Leave tools dry and the workspace ready for inspection before the next project.
Adjust cleanup to your dyeing method
| Project | What to plan for | Where to learn more |
|---|---|---|
| Fiber-reactive tie-dye | Powder measuring, application drips, covered curing containers and product-specific washout. | Five tie-dye techniques and fiber-reactive colors. |
| Ice dyeing | Melting-ice volume, a stable rack, adequate catch capacity and keeping runoff contained. | Dye under ice versus dye over ice. |
| Botanical dye bath | Plant solids, filtration materials, wet textiles, and safe handling of warm vessels. | Natural dyes and the Mimosa cotton and linen guide. |
| Indigo vat | The specific vat recipe, its ingredients and its own handling and waste instructions. | Indigo powder; use a complete vat method. |
| Mordants and auxiliaries | Separate identification and instructions for each material; chemicals are not interchangeable. | Mordants and dyeing auxiliaries, including soda ash where required by the process. |
Do not assume botanical waste is suitable for compost or a garden after it has contacted a mordant or another auxiliary. Likewise, clear-looking rinse water and a faded stain do not identify a waste’s composition. Record what went into a bath so you can ask a useful disposal question later.
Plan for leftover material and wastewater
Decide the disposal route before starting a process that produces leftover liquid or contaminated absorbent material. Check the label and SDS, then ask your local wastewater or waste authority when the permitted route is unclear. Septic systems, municipal sewers and business waste streams can have different requirements. Do not assume household collection programs accept commercial workshop waste.
Keep hazardous leftovers in appropriate identified containers and do not mix them with other products. Do not pour them onto soil, into storm drains or down a drain without an approved disposal route. Do not improvise neutralization with vinegar, bleach or another household cleaner. The EPA’s household hazardous waste guidance explains separation, labeling and seeking local disposal advice; it does not classify every textile dye bath as hazardous or approve disposal of a particular mixture.
Troubleshoot stains and recurring mess
| Problem | Check first | Change for the next session |
|---|---|---|
| Colored dots appear away from the tray. | Where powder was measured, whether lids were handled with dirty gloves, and whether air moved across the work. | Keep measuring low in the tray, close each jar and inspect the clean-touch points. |
| The catch tray overflows. | Its capacity compared with ice melt, rinse liquid and material already collected. | Reduce the batch or use suitable larger containment; do not balance a second container precariously. |
| A cleaned surface still looks stained. | Whether removable residue remains and whether the surface tolerates the proposed cleaner. | Separate residue removal from cosmetic stain treatment. Avoid adding stronger cleaners to unknown residue. |
| The next project picks up an unwanted color. | Cloth reuse, scoop cleanliness, bottle threads, rack joints and undersides of trays. | Inspect tools under good light and keep washed tools apart from the dirty area. |
| There is not enough room to rinse. | The route from application to rinsing and where wet items can safely rest. | Plan fewer garments per session or complete a smaller batch before starting another. |
Frequently asked questions
Can I use my kitchen tools if I wash them afterward?
Set aside dedicated equipment for dyeing. Choose a clearly separated kit of scoops, vessels and stirring tools so no one mistakes them for food-preparation utensils. Label the storage box and keep it outside normal kitchen-tool storage.
Are natural dyes automatically harmless?
No. Botanical material can still create dust, and a natural-dye process may involve hot liquids, mordants or other auxiliaries. Review the materials and the complete process, not just the word natural.
Should I buy heavier gloves for every task?
Choose gloves using the material’s instructions, chemical compatibility and fit. Compare economy nitrile gloves with heavy-duty nitrile gloves, but do not treat thickness alone as proof of suitability. Replace disposable gloves when appropriate; they are not reusable cleaning gloves.
Will a waterproof apron protect me from every chemical?
No. Review the apron’s product details and the materials you plan to handle. Clothing coverage, splash protection and chemical resistance are different considerations. Select the rest of your protection separately.
Can I clean everything with bleach?
Do not use one cleaner as a universal answer. Identify the residue, follow the material and surface instructions, and never mix cleaners or add bleach to an unknown dyeing mixture. Cosmetic color removal is a separate task from collecting chemical residue.
What if powder gets on my skin or in my eyes?
Stop work and follow the exact product’s first-aid directions promptly. Do not use surface cleaners on your body. Seek appropriate medical or emergency assistance for a significant exposure, breathing difficulty or concerning symptoms.
Final reset checklist
Before calling dyeing workspace preparation and cleanup complete, check the whole path of the project rather than the table alone:
- Stock containers are closed, identified and stored securely.
- Leftovers and cleanup waste have a defined handling and disposal plan.
- Tools are cleaned as directed, inspected and separated for drying.
- Tray undersides, floor areas and touch points have been checked.
- Used protection and cleanup cloths are handled according to their instructions.
- Instructions and project notes are stored in the clean area.
- The next session can begin with a clear bench and an inspection, not an unidentified residue.
For your next project, browse dyeing PPE and safety supplies, choose a compatible fiber-reactive dye or natural dye, and use a complete method from the Learning Center. Product links help you compare available supplies; this guide does not imply that every illustrated tray, container or tool is sold by The Dye Store.
References and further learning
Prepared by The Dye Store Team. The workspace layout and planning examples are practical organizational suggestions. Product labels and current safety data sheets take priority for a particular material. This guide does not certify a workplace, protective product or waste-disposal method.
- U.S. Consumer Product Safety Commission: Art and Craft Safety Guide — general studio hygiene and protective-equipment principles.
- Dharma Trading: General Safety Information for Dyes and Chemicals — dye-specific housekeeping and dedicated tools.
- U.S. EPA: Household Hazardous Waste — separation, storage and local disposal advice for applicable household wastes.
Images are AI-generated educational illustrations, not photographs of The Dye Store products or evidence of a tested protective-equipment rating. The written directions and actual product instructions govern the work.